TL;DRGetting a *host free static website up and running was never so easy as it is nowadays with services like Github webpages, AWS S3 or Azure Static websites.
- Fork and clone the repo into your machine - Link
- Install azure-cli
- Generate a GitHub developers token with repo, workflow and packages permissions
- Go into
deployment\azuredeploy.parameters.jsonfile and replace repo url and token- Access file
deployment\build_resources.shand replace tenant id and subscription ID to yours- Execute:
deployment\build_resources.sh( Make sure it has execute permissions )- Access Azure Portal, find your resouce group and see your Static Web App
In this tutorial I will give you a sample project with everything you need to get your static website up and running in less than 5 minutes. Assuming you have an account in Azure and
azure-cli installed.
The first thing you are going to need is an account on Microsoft Azure. You can get a free subscription with free credits to use on your first year. However you will probably not need any of these credits at all since the Azure Static websites have a generous free tier that is most likely enough to serve your pages without costing you a dime. Use the following Link to get your Azure subscription if you don't have one. And see bellow the table with the bandwith, SSL certificate, custom domain, storage and etc available on the free tier for this service:

On the following Link you will find the repository that you can fork, clone and use to get your website deployed. This repository is basically composed by a simple
index.html page and a folder called deployment.
This folder contains a
deployment\azuredeploy.parameters.json file which is the file where you should set the
location where you wanto deploy your webiste, i.e: US, Europe, Asia, Brazil etc, the url for the repository
( the one created when you forked the orinal repo ), the token for the deployment ( will be explained later ), name of the static website and so on.
The next file is
deployment\static_webapp.json which is the Infrastructure-as-code representation of you website in terms of infra, server, Azure service class to be used
, app name, tags and so one. Basically we will never have to configure anything manually, hence avoid human errors.
The third but not less important we have the
deployment\build_resources.sh file. Which is the bash file that will coordenate the execution of our deployment script
,this script will make sure your command line is logged in into Azure, will set the right subscription ( as you configure )
and will create the resource group and the static website within this RG.
Official repository with the project template and scripts
https://github.com/Gpzim98/StaticWebSiteAzureTemplate
Make sure to fork the repository into your account and clone it on your machine. After you forked and cloned the repository and created your account on Azure ( if you didn't have one already ) you will need to install Azure CLI on your computer since this is the tool we are going to use to make the deployment
If you are using Linux, installing the tool is quite simple:
curl -L https://aka.ms/InstallAzureCli | bash
If you are using windows or Mac OS, use see this link with full details
After you finish installing azure cli execute the following command to make sure everyting is working fine:
az login
This should bring you to your web browser and ask you to authentica to your azure account.
If everything worked fine lets move on to the next steps.
Generating a GitHub token for the deployment
On Github go to Settings > Developer Settings > Personal Access Tokens > Generate New TokenGive it a name and and check the following options
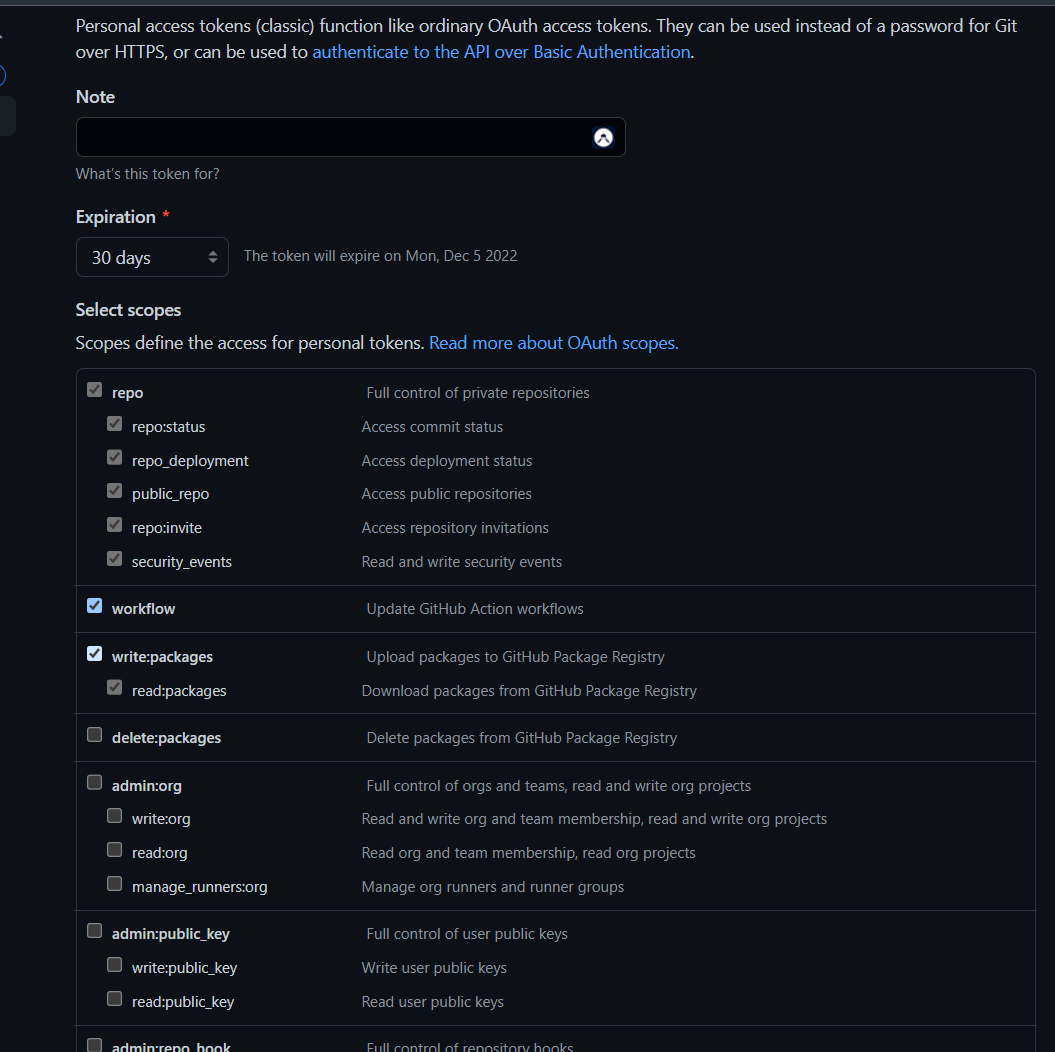
Click Generate Token and copy the given token string to a notepad ( you will not be able to see it again, so copy it 🦁 )
Now Paste it into the
repositoryToken property on the file deployment\azuredeploy.parameters.json
In the same file set the property
repositoryUrl with the URL of the repository created when you cloned the template project.
Now you are ready to deploy your infrastructre.
Open file
deployment\build_resources.sh and set tenant Id and subscription Id with the ID's from your account
Open a command line on your favorite bash terminal,
navigate into the deployment folder and execute the
deployment\build_resources.sh with the command
./build_resources.sh
Depending on your SO and command line you might need to give it execution permissions, i.e:
sudo chmod +x build_resources.sh
If everything was done correctly it should kick off the process of deployment.
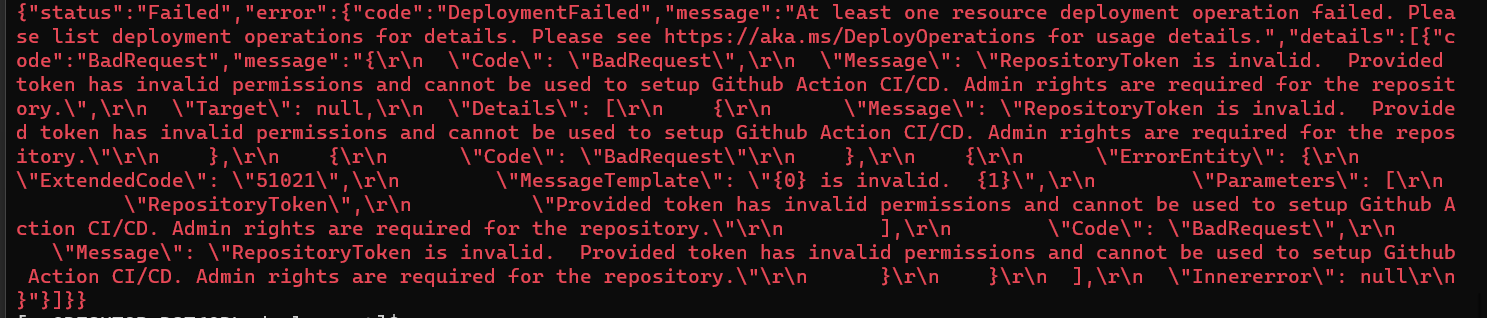
If your token was generated with incorrect permissions you might see an error similar to this one:
After the process is finished you can go to your Azure account > Resource groups
And in here your should see your resource group with the same name as it is configure on the file
deployment\build_resources.sh on the constant RESOURCEGROUP

Now to see your static website, go to your resource group and see the static website created accordingly.
On the overview page you should be able to grab the URL and paste it into your web browser to see the Hello world page up and running.
Updating the website
If you go to your repository on Github and refresh the page you will notice that the previous process created a folder called.github/workflows
and inside of it a yaml file with the steps that will automatically push changes to Azure everytime a new commit is made to your repository.
It means that you don't need to do anything furter, just keep adding content to your website and pushing it to GitHub that the magic will happend.
If you click on the Actions tab on your repository you will notice that an action ran when we deployed our infrastructure:
ci: add Azure Static Web Apps workflow file #1
This is basically the execution of the steps described on the yaml file, that grabbed the code of the repo and pushed it into the Azure Static Website.
Secrets and tokens
In order for the GitHub actions to be able to push new code the Azure Static Web App a token was generated when thedeployment\build_resources.sh script was executed.
This token was then stored on your repository's secrets on:
repository's settings > Secrets > Actions